
Tenda Routers are known for possessing excellent routing capabilities. Whether it is about fulfilling your networking requirements for home or small office, these routers deliver exceptional results. Performing a Tenda Router setup requires you to have a laptop or desktop computer that can be connected to the router and start with the setup process. If you have any WiFi-enabled device, like laptop, iPhone, iPad, or any Android device, you can connect them to the Tenda Router wirelessly and surf the internet.
Carefully read this web page to understand how a Tenda Router setup is done, what are some Tenda Wireless Router features, and how you can resolve some of the commonly occurring Tenda Router issues.
Tenda Router Manual Guide:
Your newly purchased Tenda Router comes with the Tenda Router manual that includes detailed information about the device such as the router specification, Tenda Router firmware, Tenda WiFi Router login username and password, the installation process and so on. It is recommended that you go through this manual so that you get an overview of the product.
How to Do Tenda Router Setup?
Users often search online for how to setup Tenda Router and start performing it on their own. However, you must ensure that you follow the accurate set of rules to set up a Tenda Router. Here’s a look at the series of steps involved in it:
- To start with the Tenda Router setup, complete the physical connection of the device first.
- Plug one end of an Ethernet cable to the modem and the other to the blue WAN port of the Tenda Router.
- Connect your PC with the router using another Ethernet cable.
- Open a web browser on your PC and browse the default IP address of the Tenda Router, i.e., 192.168.0.1; press Enter for Tenda Router login.
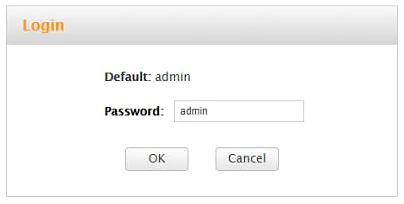
- Type “admin” in both the username and password field; press Enter to log into the router’s admin panel.

- Once you are logged into the router management console, you will see the router setup wizard. Click on Next and choose the Internet Service provider followed by a click on Apply.
- You can access the various tabs such as Basic Settings, Wireless Settings, Advanced Settings, etc. to configure your router.
Tenda Router Firmware | Update Tenda Router Firmware
Ensuring an updated firmware on your Tenda Router is critical towards the smooth functioning of the device. Moreover, installing the latest firmware version adds some extra features to the device. In most of the cases, it provides fixes to any performance related issues of the router.
How To Update Tenda Router Firmware?
Before you update the Tenda Router firmware, visit Tenda’s website to download the latest firmware version. Once you download it, follow the below-mentioned steps:
- Launch a web browser on your computer and browse the default IP address of the router, i.e., 192.168.0.1.
- Enter the default username and password of the router, unless you changed it. Press Enter to log into the router admin panel.
- Under the Internet Connection Setup tab, click on Advanced and then on Tools.
- In the left-hand panel, click on the Firmware Update link and then click on Browse.
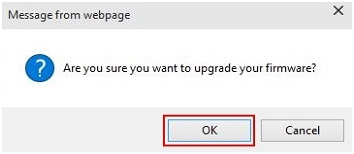
- Double-click on the downloaded Tenda Router firmware file and click on Upgrade.
- Click OK in the pop-up window.

Tips To Connect To Tenda Routers via WiFi
If you have a WiFi-enabled device such as laptop, iPhone, or Android devices, you can connect them to the wireless network of your Tenda Router. You can follow the below-mentioned steps to connect your computer to Tenda Router via WiFi:
- Switch on your computer and the router.
- Ensure that the power LED on the router is lit and that the internet light is flashing.
- Now click the wireless network option on your computer and locate your wireless network from the list of available SSIDs.
- Click on your wireless network name and enter the passphrase in the required field.
- Click on Connect to connect the computer to WiFi.
How To Configure Tenda F3 N300 Wireless Router?
Tenda F3 N300 Wireless Router is among the top-selling routers among the Tenda Family. The advanced features and sleek look of the router makes it among the top choices of many individuals. Here’s how you can configure it:
- First, set up the physical connection of the router by plugging one end of an Ethernet cable to your modem and another to the WAN port of the router.
- Next, plug one end of another Ethernet cable to the LAN port of your computer and another to one of the LAN ports of the router.
- Open a web browser on your PC and browse the router’s default IP.
- Type admin as the default Tenda Wireless Router username and the password; press Enter.
- Once you are logged into the router’s admin panel, you can start configuring the router.
Tender Router Reset | How To Reset A Tenda Router?
Resetting the Tenda Router helps you in dealing with many issues of the router. It includes bringing back the device to factory default settings, restoring the default router password, and so on. Follow the below-mentioned steps to reset your Tenda Router:
- Switch on the router and ensure that the power LED is lit.
- Press and hold the reset button of the router for about 10 seconds; you will notice that the status lights flicker.
- Release the reset button and wait for the router to reboot on its own.
- Your Tenda Router reset is completed.
Frequently Asked Questions (FAQs) on Tenda Router Setup
- What is Tenda Router’s login username and password and how to do a Tenda Router login?
The login username and password of Tenda Router is admin. To do a Tenda Router login, follow these steps:
- Open a web browser on your computer.
- Type 192.168.0.1 in the browser’s address bar and press Enter.
- Once you are logged into the router management console, you can set up or configure the router according to your unique requirements.
- How to configure a Tenda Router?
Configuring a Tenda Router requires you to first set up the physical connection. To start with, connect the router to the modem using an Ethernet cable. Next, using another Ethernet cable, connect the router and your PC. Lastly, browse the router’s default IP address, enter the router login credentials, and access the router management console.
- Why is firmware upgrade necessary in Tenda Routers?
An upgraded Tenda Router firmware eliminates the risk of encountering many router issues. Also, upgrading the router firmware adds new features to the device that helps you maintain its smooth functioning.
- What is Tenda WiFi Router login and how to connect it to my laptop?
Tenda WiFi Router login is the process of logging into the routers admin panel. You need to browse the default IP of the router and enter the router login credentials to log into the Tenda WiFi Router. If you need to connect a laptop to the WiFi Router, follow these instructions:
- Turn on the laptop and your Tenda Router.
- Ensure that the power LED of the router is lit and that the internet light is flickering.
- Now click the wireless network option on your computer and locate your wireless network from the list of available SSIDs.
- Click on your wireless network name and enter the passphrase in the required field.
- Click on Connect to connect the computer to WiFi.
Ensuring smooth functioning of the Tenda Router depends on proper setup and configuration of the device. Follow the Tenda Router setup steps as listed in this web page and connect various WiFi-enabled devices to it for accessing the internet wirelessly. Also, ensure that the router firmware is updated so that you can eliminate the risk of encountering certain issues of the router.