
Designed for both office and home network, the Netgear Centria WNDR4700 provides automatic backup for both PCs and Macs. The high-speed Netgear WNDR4700 N900 WiFi router has a 802.11n Dual band and built-in storage bay. With the Netgear WNDR4700 N900, you can protect your files and media. It allows you to share and stream movies, music, and much more. Enjoy fast WiFi connectivity for all the supported devices using the Netgear Centria WNDR4700 wireless router.
On completing the setupof Netgear Centria WNDR4700, you can connect it to a printer and wirelessly fulfill your printing tasks. The Netgear WNDR4700 Wireless N900 Router setup enables you to access the router management console and make customizations according to your unique networking requirements. Carefully read this web page to learn how the setup of Netgear WNDR4700 Wireless N900 Router is done and understand how to troubleshoot some of the commonly occurring Netgear WNDR4700 Wireless N900 router issues.
Netgear WNDR4700 Manual Guide
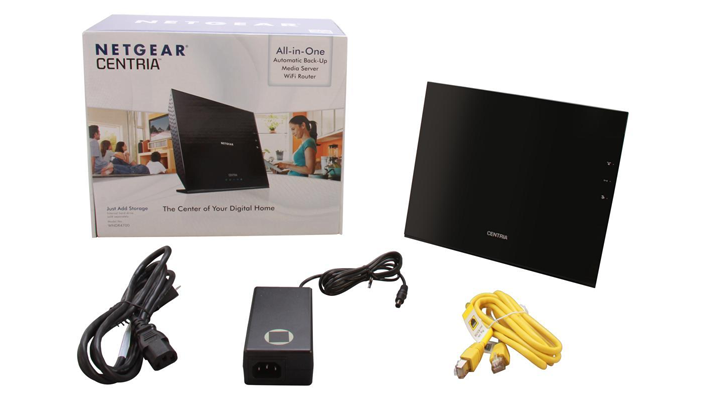
The package of Netgear Centria WNDR4700 router includes the Netgear Centria WNDR4700 manual. You can refer to the Netgear WNDR4700 manual for detailed information on Netgear WNDR4700 update, Netgear WNDR4700 Wireless N900 router setup, Netgear WNDR4700 firmware update, Netgear WNDR4700 N900 specifications, and so on. In case you encounter any issues while setting up the router, you can refer to the Netgear Centria WNDR4700 manual and save a lot of time.
Netgear N900 WNDR4700 Setup
How to do Netgear WNDR4700 Wireless N900 Router setup?
Just like the other Netgear N900 Router model setups, the setup of Netgear N900 WNDR4700 is divided in two phases – Phase 1 and Phase 2. Here’s a look:
Phase 1: Configuring the Netgear WNDR4700 N900 Router
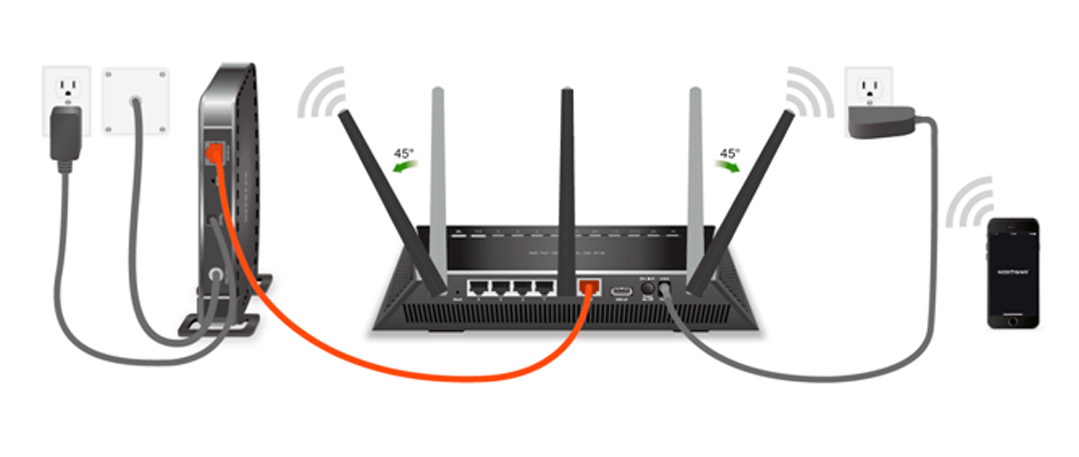
Before we set up the Netgear WNDR4700 Router, we must do a physical connection of the router.
- Disconnect any cables connected to the computer and turn on the modem.
- Connect the router by plugging one end of an Ethernet cable to the modem and the other to the internet port of the router.
- Plug one end of an Ethernet cable to the LAN post of the computer and other to any one of the ports of the router.
- Plug in the router adapter to an electrical power outlet and switch on the router.
Phase 2: Netgear WNDR4700 Router Login
- Connect the router and your computer using an Ethernet cable.
- Open a web browser and type in www.routerlogin.com.
- Hit Enter to open the router login console.
- Enter the default router login credentials mentioned at the back or bottom of the router.
Some Common Netgear Centria WNDR4700 Setup Issues
- Unable to access routerlogin.com
- 168.1.1 page not accessible.
- Connection interrupted at 192.168.1.1.
- Not connecting to the internet after Netgear N900 WNDR4700 setup
- WiFi error while connecting through WNDR4700 Netgear N900
- Can’t upgrade Netgear WNDR4700 firmware
- Netgear WNDR4700 default password not working
- NetgearWNDR4700 default login username not working
- Unable to perform the NetgearWNDR4700 reset
- Netgear Router WNDR4700 error 404
- Router error 651
- IP address conflict
- VPN issues during the NetgearWNDR4700 N900 setup
- Netgear N900 WNDR4700 password recovery issues
Netgear N900 WNDR4700 Setup | Troubleshooting WNDR4700
- Ensure that all the cables such as the power cable and the Ethernet cable are properly connected. Maintain a visible distance between the router and the modem to avoid the WiFi signals from clashing.
- If any devices are not in use; however, they are connected to the WiFi network, turn them off.
- If www.routerlogin.com is not working, check your web browser. If the issue persists, try browsing 192.168.1.1 to access the router management console.
- Ensure that you use the updated web browser.
- Delete browser cache and cookies, and disable any proxy servers in use.
- Restart the whole wireless network as well as the modem.
- If you are unable to log in using the Netgear WNDR4700 default login password and the username, refer to the Netgear WNDR4700 manual for these details.
- If you have lost or forgotten the Netgear WNDR4700 default password, hard reset your router.
- Disable the firewall or any proxy servers in use to resolve VPN issues during the Netgear N900 WNDR4700 setup.
- Check the DNS servers and hard refresh the web page to resolve the Netgear WNDR4700 error 404.
- If you have encountered error 651, reinstall the network adapter driver and update the Netgear WNDR4700 firmware.
Netgear WNDR4700 Firmware Update

Performing a Netgear WNDR4700 firmware update resolves various issues of your router. Besides, upgrading the Netgear Centria WNDR4700 firmware adds new and advanced features to the Netgear router. Given below are the series of steps to perform an upgrade of Netgear Centria WNDR4700 firmware:
- Open a web browser on your computer and visit Netgear’s official site.
- Download the latest firmware version of Netgear WNDR4700.
- Using an Ethernet cable, connect the computer and the router.
- Type in www.routerlogin.net and hit Enter.
- Enter your router login credentials and press Enter.
- Under the Administrator tab, click on Advanced.
- Click on the “Firmware Update” option.
- Choose Upload, and select the downloaded file.
Frequently Asked Questions (FAQs) on Netgear WNDR4700 N900 Router
How to set up Netgear Centria WNDR4700 Router?
To set up the Netgear Centria WNDR4700 Router, follow the steps mentioned below:
- Disconnect any cables connected to the computer and turn on the modem.
- Connect the router by plugging one end of an Ethernet cable to the modem and the other to the internet port of the router.
- Plug one end of an Ethernet cable to the LAN post of the computer and other to any one of the ports of the router.
- Plug in the router adapter to an electrical power outlet and switch on the router.
- Connect the router and your computer using an Ethernet cable.
- Open a web browser and type in www.routerlogin.com.
- Hit Enter to open the router login console.
- Enter the default router login credentials mentioned at the back or bottom of the router.
How do I perform a factory reset of the Netgear Centria WNDR4700?
Performing a factory reset of the Netgear WNDR4700 Router requires you to follow the below-mentioned steps:
- Insert a pointed object such as a paperclip into the reset port of the WNDR4700 router and hold it for about 10 seconds.
- Once the power lamp of the router flashes, release the paper clip and wait for the router to reboot.
How can I upgrade the Netgear Centria WNDR4700 firmware?
Follow the below-mentioned steps to upgrade the Netgear Centria WNDR4700 firmware:
- Open a web browser on your computer and visit the official site of Netgear.
- Download the latest firmware version of Netgear WNDR4700.
- Using an Ethernet cable, connect the computer and the router.
- Type in www.routerlogin.net and hit Enter.
- Enter your router login credentials and press Enter.
- Under the Administrator tab, click on Advanced.
- Click on the “Firmware Update” option.
- Choose Upload, and select the downloaded file.
Why do I need a firmware Netgear WNDR4700 update?
The Netgear WNDR4700 firmware update resolves various issues of your router. Additionally, upgrading the NetgearCentria WNDR4700 firmware adds new and advanced features to the router.
How to change the wireless channel of my Netgear WNDR4700 router?
Follow the below-mentioned steps to change the wireless channel of your Netgear WNDR4700 router:
- Connect your router and the computer using an Ethernet cable.
- Open a web browser on your computer.
- Type in www.routerlogin.com on the browser’s address bar and hit Enter.
- Enter the router login username and password.
- Click on Wireless.
- Select your region from the Region menu.
- From the Channel menu, select a number.
- Click on the Apply option to save the changes.